

The first step is deciding where you want to possition the tunnel and how big you want to make it. The garden here runs North South with the house at the southern end. A line of tall conifers 35 feet high both shades and shelters the Western boundary. I decided to remove a line of hedging to make some room for the tunnel. Width was an issue and I did,nt have the space for a standard 10 foot wide tunnel.
After clearing the area I used the 3/4/5 pythagoras rule to set out the basis shape and using 10 mm reinforcing bar/string marked the footprint out as with any build.


Being over optomistic structurally I decided that it might be possible to span the 8 feet using 3/4 inch pipe. This was a mistake it’s much too flexible!. The rebar and 3/4 inch water pipe has come in handy since for protected covering etc as the re-bar fits perfectly into the pipe as does typical bamboo dims.
I needed to get stronger foundations and stronger piping and eventually went for the following setup. I got the piping in Chadwicks Sallynoggin Dublin . Ask for Shane Jordan ( helpfull guy). They have 60mm O/D (outside dimension) Qualplast. You will need to bring along a bit of the piping you choose to the steel yard to be sure of a fit.I would not recommend the standard 48.3mm scaffold as a cheap option as it is difficult to find a piping to sleeve over it comfortably without cutting or additional work. I got the steel cut at a steel yard. It cost 70 euro to get 10 x 6 foot lenths of 43 mm galvanised steel tubing.Its 43 mm O/D and allows the plastic piping to fit over it easy. The weight of a person is enough to sleeve it into possition.

Once set out drive the 6 feet steel tubing into the ground to a depth of 3 feet using a sledge hammer, use a piece of timber to protect the pipe. The tubes are 4 feet apart. For the 8 feet diameter I cut the plastic pipe 5.4m long giving a ridge height of 2.1 m plenty for the door and head height. In total I needed about 30 metres of plastic pipe at a cost of about 60 euro.
I did,nt want to use a trenching system so I designed a simple baserail.I got some 16 feet lengths of 20mm board and drilled through the board and into the steel tubing to fix this. 

Using the base rail as a guide I drilled through the plastic pipe and steel pipe and bolted to secure. This acts as an anchor for the structure preventing uplift. To protect the baserail timbers I used a stabled on strip of D.P.C. and a paint on wood preservative.

The structure ended up being quite strong.

I used 2×1 batten to stiffen and some diagonals on the corners for lateral stability.


Above the diagonal bracings and a 100mm air gap. The soil/compost does not touch the base rail to prevent rotting. This way it is easier to replace rotten timbers in time.

Door detail

Top of door frame is secured to plastic tubing using 1 inch galvaband.

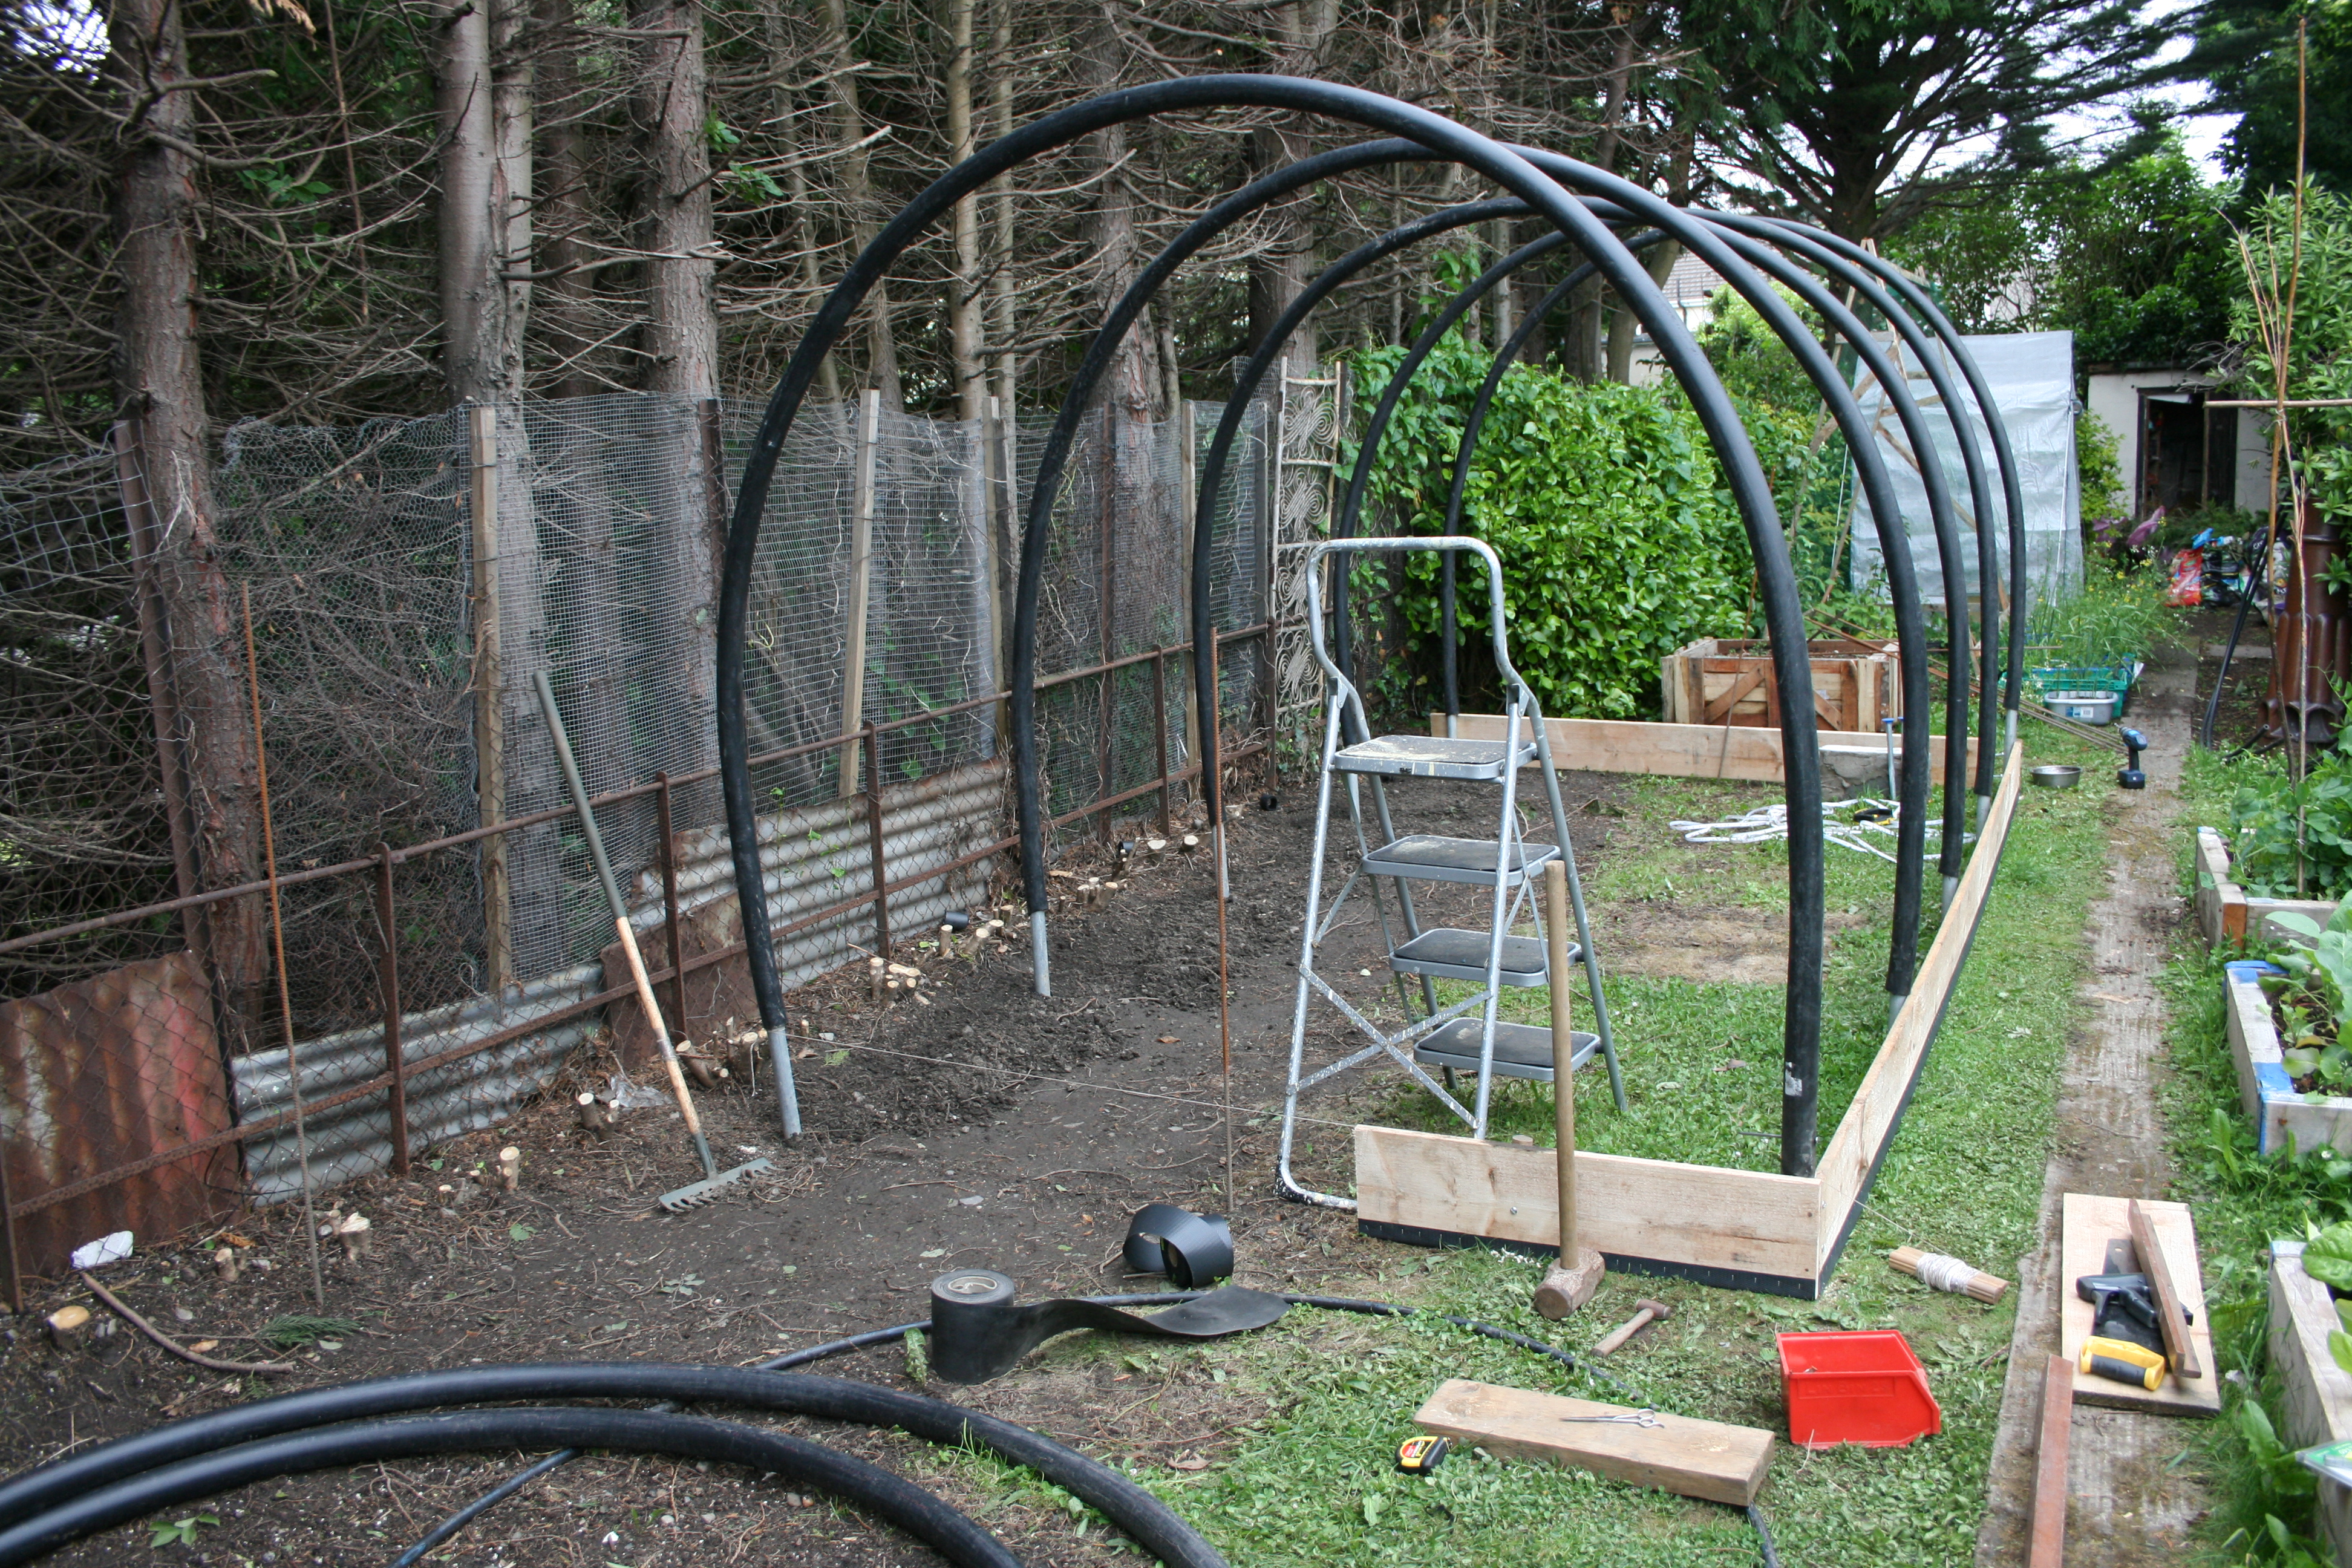
This is the basic structure before the covering went on. Its quite sturdy
Before the covering goes on its important to use anti-hot spot tape on the plastic pipes where the covering will touch. This prevents the covering from chemically reacting with the plastic pipe and becoming brittle thus prematurely needing replacement.


To secure the plastic covering I fixed lenths of of 2×1 to the baserail.

Then lengths of batten are used to secure the plastic. There is a method to attaching plastic to a tunnel. Start by getting tention above the doors on both ends. Then move to the centre on the sides and fix short lenths of batten tentioning as you go. This was the only part of the build that I need a second person to help. Work from the middle into the corners. Then start fixing around the doors and finish working the folds to the bottom of the doors.Its worth looking this in detail.


The plastic covering going on. Its best to do the work in the early summer on a warm dry and calm day as this help to get good tention on the plastic allowing it to stretch with the heat..The covering came from highbank, it’s 1000 guage plastic.


My wife Laura and I had quite a long day working on getting the plastic tentioned properly. We were very pleased with the result as was little Archie.
As I did,nt want to dig the ground I basically built raised beds inside, independant of the structure. I began by laying overlapping carboard boxes I got from a bike shop on the ground.
. 
The rebar cut into short lenths came in handy to support the timbers of the raised bed. I filled them with a mix of rotten down farmyard manure, envirogrind, sieved and screened topsoil from elsewhere in the garden, some leaf mould and enrich compost.
Then the great pleasure of bringing in some plants from my smaller 6×8 foot greenhouse and planting out the tunnel.

I was,nt too worried about perrenial weeds etc on the paths as I reconed by making sure they received no water and got plenty walked on ,they would die off.

The tunnel was planted up in late July, here it is in August 2012. Not too many red tomatoes that year. In the background a geodesic duck enclosure under construction.

This is the tunnel before the pond went in and my neighbours trees got a haircut 2013. 
This is the tunnel after further gardening projects in 2013.

Tunnel in spring 2013 planted up with rotation in mind.

The beautiful summer we have just had ment there was plenty of tunnel produce here I trained a cucumber along the roof. 
Tomatoes underplanted with beetroot, Chillies and aubergines, courgette cucumber, , nasturtiams, and marigold
My advise to anyone thinking about getting a polytunnel is to have a go at making your own. You will learn lots by doing it. This is a relatively small tunnel suitable for a typical back garden, but the principals can be applied to much larger versions with the inclusion of intermediate timber supports. I know of a few people who have made these and they work fine in more exposed sites. The tunnel is over a year old now and while the garden is relatively sheltered it’s still doing very well. The tention is still like a drum.I did have a slight issue with the ducks and chickens pecking at the plastic near the baseboard. This may have had something to do with fact that they are attracted to red objects. I probably would,nt paint the next tunnel red. I would include a grill above the doors in a revised design to allow pollinators to gain easy access.MOST IMPORTANTLY there is an inside and outside to polythene. When standing inside the tunnel you should be able to read the writing on it by turning your head, if the writing is backward then turn this face to the outside otherwise you will have excessive condensation inside. On a larger tunnel I would definately include a generous potting and propagation area. Personally I have tried rigging up drip feed systems but as the space is small I quite enjoy hand watering and keeping a close eye on things.
Below is a small 6 x 8 feet demountable polythene covered greenhouse I designed and built. Completely different approach to creating protected cropping. This is where I start all my plants on shelves. It was built in sept 2011 and is doing well.


The basic construction is 2x 4 timbers built as frames and bolted together using treaded bar. Pipe insulation is cut open and used to protect the polythene from the timber. If I did this again I would use corrigated plastic sheets or glass possibly. There is plenty of room in it for growing food in raised beds. I have a vine growing in a pot to the rear trained inside the tunnel providing a little summer shade and some grapes. Its a lot of fun experimenting with different ideas in the garden.
Make a plan and stick with it !

Hi Pat – superb blog post and a fantastic tunnel design. I’ve been meaning to make something using pipe like that for ages but never got round to it. This has inspired me to get out there next spring and get building. Thanks! Tom.
Thanks Tom. pat
I see you got the Leylandi trees cut over the summer, what a difference in terms of light.
The garden is looking good.
Big difference for sure
Pingback: BKS-Steel
Pingback: Welded round steel pipe | BKS-Steel
Reblogged this on Casa de Cultura Permanenta and commented:
[English below]
Permacultura urbana. Un model care ne inspira foarte mult in planificarea gradinii Casei 🙂
___________________________________
Urban permaculture. A model that inspires us a lot in planning the garden of the Club 🙂
Have fun building your own .
Fantastic. Love the whole scheme.
Suzie shared on the Dulra FB page.
Hope to meet you there next year.
M
Thanks very much . pat
Reblogged this on growyourgrub and commented:
This is a friend’s version of a self-build tunnel, similar to the one we built 2 yrs ago and described in an earlier post.. good man Pat
This is brilliant, thanks for going through the process in detail – makes it seem do-able! We really need some covered space for growing – might give this a go…
Very helpful, will be having a go myself appreciate the detail. Thanks for doing the blog
Hi Pat,
What was your total spend on this tunnel? I am in Croatia and want to build one on my allotment.
Great job btw and super photos!
Neil
Hi love this. Best diy tunnel i have seen. One question where is best place to get the polythene.,
thanks
edwarf
Hi Edward I got the 1000 guage plastic from http://www.highbank.ie pat